1st gen I/C into N/IC 1st gen

Moderators: Greenleaf, BC847, Richie O

1st gen I/C into N/IC 1st gen

Postby pulltilbroke » Sat Feb 07, 2009 12:26 am

I finaly got all my parts for an intercooler install and decided to to a little write up on it.

With this install you WILL NOT be able to retain you're A/C condensor also with this install I flipped the I/C upsidedown

Tools you'll need

Socket set and rachet with a few extensions,a couple screw drivers,drill with assorted bits, sawzall wit a sharp blade, a sharpie, and a tape measure

Parts you will need

1st gen intercooler,1st gen piping, 8 2 1/2" t-bolt clamps or constant torq clamps, 1 2 1/2" v-band clamp, 1 90* v-band elbow, and 4 2 1/2" hump hose boots


First start by removng the Headlight bezels, grille insert, outer grill shell and lower filler panel

Image


Next remove the radiator and A/C condensor if equipped

Image

Now measure 7" down from the bottom side of top of the core support and make a mark, now measure 5 1/4" down from that mark and make another mark, now measure 3 1/2" over from the radiator opening in the core support and make a mark, and repeat on the other side of the support

Image

Once you have your core support cuts laid out you can go ahead and fire up the sawzall and start hacking

Image

Some additional trimming may be required


Now that you have your holes cut in you're core support you can go ahead and and start fitting you intercooler


Image


Now establish where you need to drill your mounting holes (I just held the cooler where it looked centered and marked it with a sharpie) once this is done you can go ahead and drill the holes

Image

You can now measure the space between the core support and the mounting tabs of the cooler, make a note of this measurment and measure the other side, make a note, now you can go cut you're spacers out of some pipe or whatever you got layin around(my measurements were 1 13/16 on the pass side and 1 1/2 on the drivers side

Once you get you're spacers cut you can bolt the cooler in place( remember to put some thin strips of rubber between the cooler and the core support)

I used some 3/8 bolts 3 1/2" long and used fender washers.

Image
Image

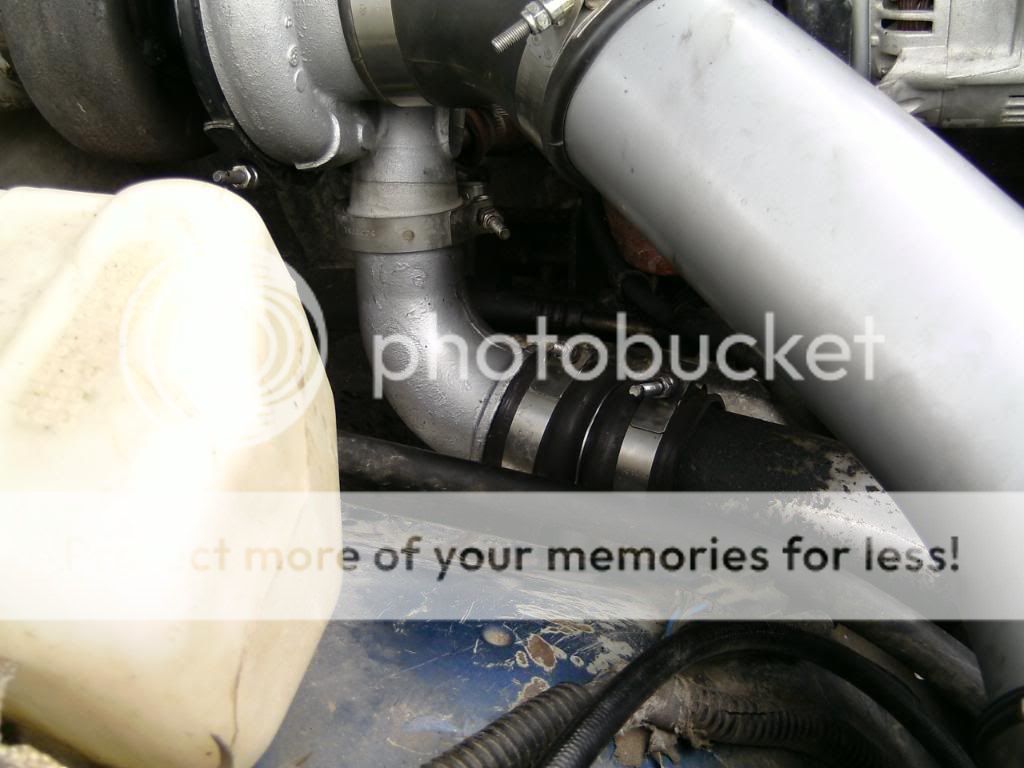
Now you can hook up all you're plumbing

Image
Image

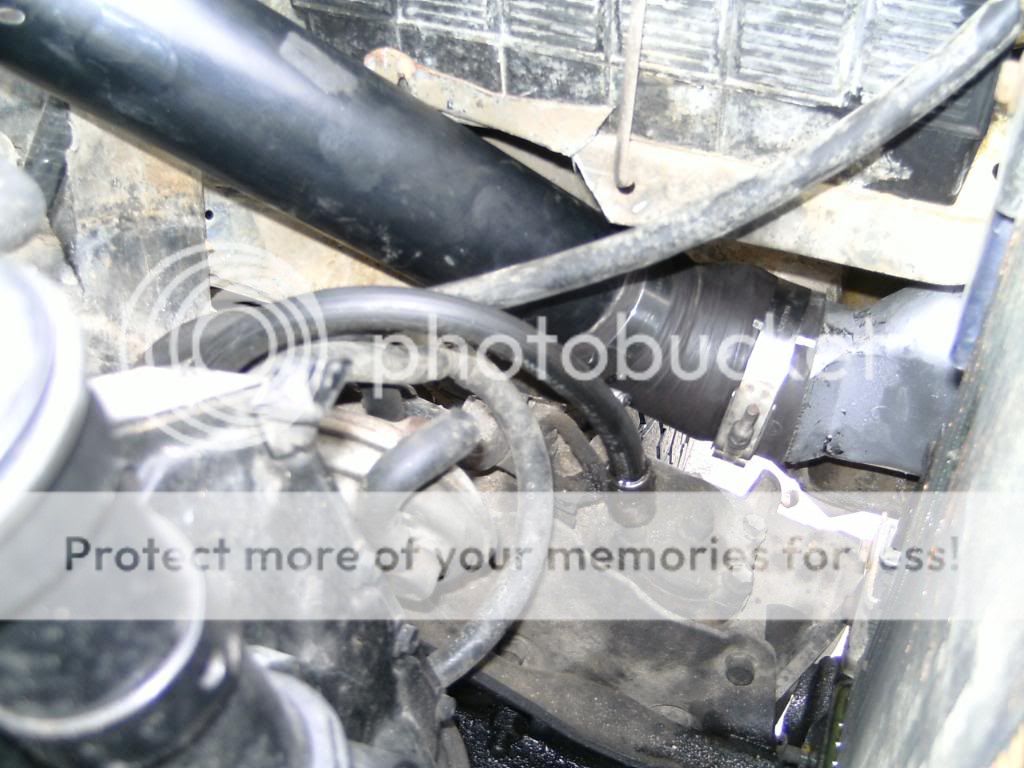
Next you will have to trim the radiator mount to clear the inlet and outlet of the cooler

After this is done put the radiator back in the truck


I will post more tomorow after I trim the lower filler panel and get the grille installed in the truck
90 W250 reg cab, Modified knuder valve, reversed reciprocting dinglearm adjusted, High volume flux capacitor,upgraded whirlygig, A clutch and a hitch
93 W350 ext cab dually, getrag and a few adjustments
pulltilbroke
14mm rotor
 
Posts: 1410
Joined: Fri Jan 18, 2008 1:20 am
Location: Eagle Ne

Postby ccoxva » Sat Feb 07, 2009 10:12 am

I wrecked my ic truck but old blue is still non ic. Wondering why I couldnt take that rad support and stuff and just switch it over?? Or is something diff. I still got everything but the intercooler.
1991 N/I 250
1996 Dodge 3500 Ex. Cab Dually 19.5's
User avatar
ccoxva
fuel screw!!!!
 
Posts: 113
Joined: Tue May 22, 2007 7:12 pm

Postby burnt_servo » Sat Feb 07, 2009 10:18 am

ccoxva wrote:I wrecked my ic truck but old blue is still non ic. Wondering why I couldnt take that rad support and stuff and just switch it over?? Or is something diff. I still got everything but the intercooler.


the rad suport should be a direct swap ..... but you may have to use the inertcooled rad and shroud too .
'93 w250 .... stock ...
curently removing the dead moose parts ....
User avatar
burnt_servo
fuel screw!!!!
 
Posts: 472
Joined: Wed Dec 26, 2007 2:19 pm
Location: northern b.c. , canada
Top

Postby pulltilbroke » Sat Feb 07, 2009 7:12 pm

I got the grille and every thing put back together today

This is what I had to do

I trimmed the lower filler panel to clear the cooler and to get more air through it

Image
Image

I then installed the outer grille shell

Image


Next you'll have to trim the back of the grille insert(I ended up cutting a lot more than I wanted to but I guess when I do a PS I/C I'll have enough room)

Image
Image

I'll probably end up making some stainless steel inserts for the grill so it'll look a little better

Image

Driving Impresions

I noticed EGT's dropped 50* at idle, it dropped 100* at cruiseing speed and dropped 200* at WOT

I also noticed a 10 psi drop in boost but later discovered a small boost leak in one of the cheesy factory boots, I will report new results after Iget some new silicone boots on the old truck

On the test drive I saw a max boost pressure of 36PSI and a max EGT of 1250 degrees, and the climb there was a lot slower

All in all I'm very pleased with my install and would recomend it to anyone with a N/IC truck that can live without A/C
90 W250 reg cab, Modified knuder valve, reversed reciprocting dinglearm adjusted, High volume flux capacitor,upgraded whirlygig, A clutch and a hitch
93 W350 ext cab dually, getrag and a few adjustments
pulltilbroke
14mm rotor
 
Posts: 1410
Joined: Fri Jan 18, 2008 1:20 am
Location: Eagle Ne
Top

Postby ccoxva » Sat Feb 07, 2009 8:20 pm

Great pics and info.
1991 N/I 250
1996 Dodge 3500 Ex. Cab Dually 19.5's
User avatar
ccoxva
fuel screw!!!!
 
Posts: 113
Joined: Tue May 22, 2007 7:12 pm
Top

Postby bgilbert » Sun Feb 08, 2009 9:43 am

What a shame you did to that old school grill :oops: :lol: . If you did it the way I told ya to, you wouldn't have needed to touch the grill ;) . Another note, you can just grind that AC condensor raised mount off the IC.
Bill Gilbert
85 D350 crew with 90 6BT intercooled Getrag 3.07's
93 D350 single cab Getrag 3.54's.
bgilbert
14mm rotor
 
Posts: 2253
Joined: Wed Jan 03, 2007 5:04 pm
Location: Terre Haute, Indiana
Top

Postby pulltilbroke » Mon Feb 09, 2009 7:31 pm

Got my 12v air horn today

Image
Image
Image
Image

Within the week we will have some new silicone boots on everything
90 W250 reg cab, Modified knuder valve, reversed reciprocting dinglearm adjusted, High volume flux capacitor,upgraded whirlygig, A clutch and a hitch
93 W350 ext cab dually, getrag and a few adjustments
pulltilbroke
14mm rotor
 
Posts: 1410
Joined: Fri Jan 18, 2008 1:20 am
Location: Eagle Ne
Top

Postby RumbleFish » Mon Feb 09, 2009 8:06 pm

what, no rtv on the valve covers?
User avatar
RumbleFish
14mm rotor
 
Posts: 2648
Joined: Thu Jan 11, 2007 1:19 pm
Location: Indiana
Top

Postby pulltilbroke » Mon Feb 09, 2009 8:55 pm

No, why would I use rtv on the valve covers
90 W250 reg cab, Modified knuder valve, reversed reciprocting dinglearm adjusted, High volume flux capacitor,upgraded whirlygig, A clutch and a hitch
93 W350 ext cab dually, getrag and a few adjustments
pulltilbroke
14mm rotor
 
Posts: 1410
Joined: Fri Jan 18, 2008 1:20 am
Location: Eagle Ne
Top

Postby pulltilbroke » Sat Feb 14, 2009 9:10 pm

Well I changed it up again today

I got a 24v horn, and I fabbed up a stainless pipe

Image
Image
90 W250 reg cab, Modified knuder valve, reversed reciprocting dinglearm adjusted, High volume flux capacitor,upgraded whirlygig, A clutch and a hitch
93 W350 ext cab dually, getrag and a few adjustments
pulltilbroke
14mm rotor
 
Posts: 1410
Joined: Fri Jan 18, 2008 1:20 am
Location: Eagle Ne
Top

Postby pulltilbroke » Thu Apr 09, 2009 3:17 pm

Well we changed a few things up again, we now have a 2nd gen I/C in the truck with 2nd gen plumbing

Image
Image
Image
Image
90 W250 reg cab, Modified knuder valve, reversed reciprocting dinglearm adjusted, High volume flux capacitor,upgraded whirlygig, A clutch and a hitch
93 W350 ext cab dually, getrag and a few adjustments
pulltilbroke
14mm rotor
 
Posts: 1410
Joined: Fri Jan 18, 2008 1:20 am
Location: Eagle Ne
Top


Return to Cool projects YOU can do

Who is online

Users browsing this forum: No registered users and 17 guests