Clutch master cylinder pushrod repair

How they work, how they don't work, and how to fix them

Moderators: Greenleaf, BC847, Richie O

Clutch master cylinder pushrod repair

Postby Mieser » Sat Jun 18, 2011 4:44 pm

I thought I would post a copy of this from my build thread over there. I have heard from more than one 1st gen owner that had/has the same problem I did. My clutch pushrod linkage was TOAST. This was not only the pushrod but also the pin on the clutch pedal. Here is how I modified and repaired it. Overall cost was about $20 and an hour or two of time. This fixed many little issues for me, the transmission now shifts a LOT more smoothly and I am sure the full clutch disengagement will help syncro life a fair bit.

So...here you go.

I finally fixed the clutch linkage! It should last another few hundred thousand miles now.

First you have to take the clutch pedal out. There is a little 3/8" bolt on the passenger side of the pedal pack. This holds the pivot shaft in the pedal assembly. I used a stubby 1/4" drive 3/8 socket on the nut side and a 3/8" end wrench on the bolt side which is hidden kinda up behind the pushrod to the brake master cylinder.

You need to disconnect the clutch master cylinder push rod from the clutch pedal pin. Mine was being held on with some duct tape....so that didn't take me too long.

I used my finger to get the pivot shaft started from the drivers side of the pedal pack. You don't need to completely remove the pivot shaft, you only need to move it back far enough to get the clutch pedal to drop out. Mine came out pretty dang easy. Make sure to keep track of the two nylon bushings for the clutch pedal.

Image

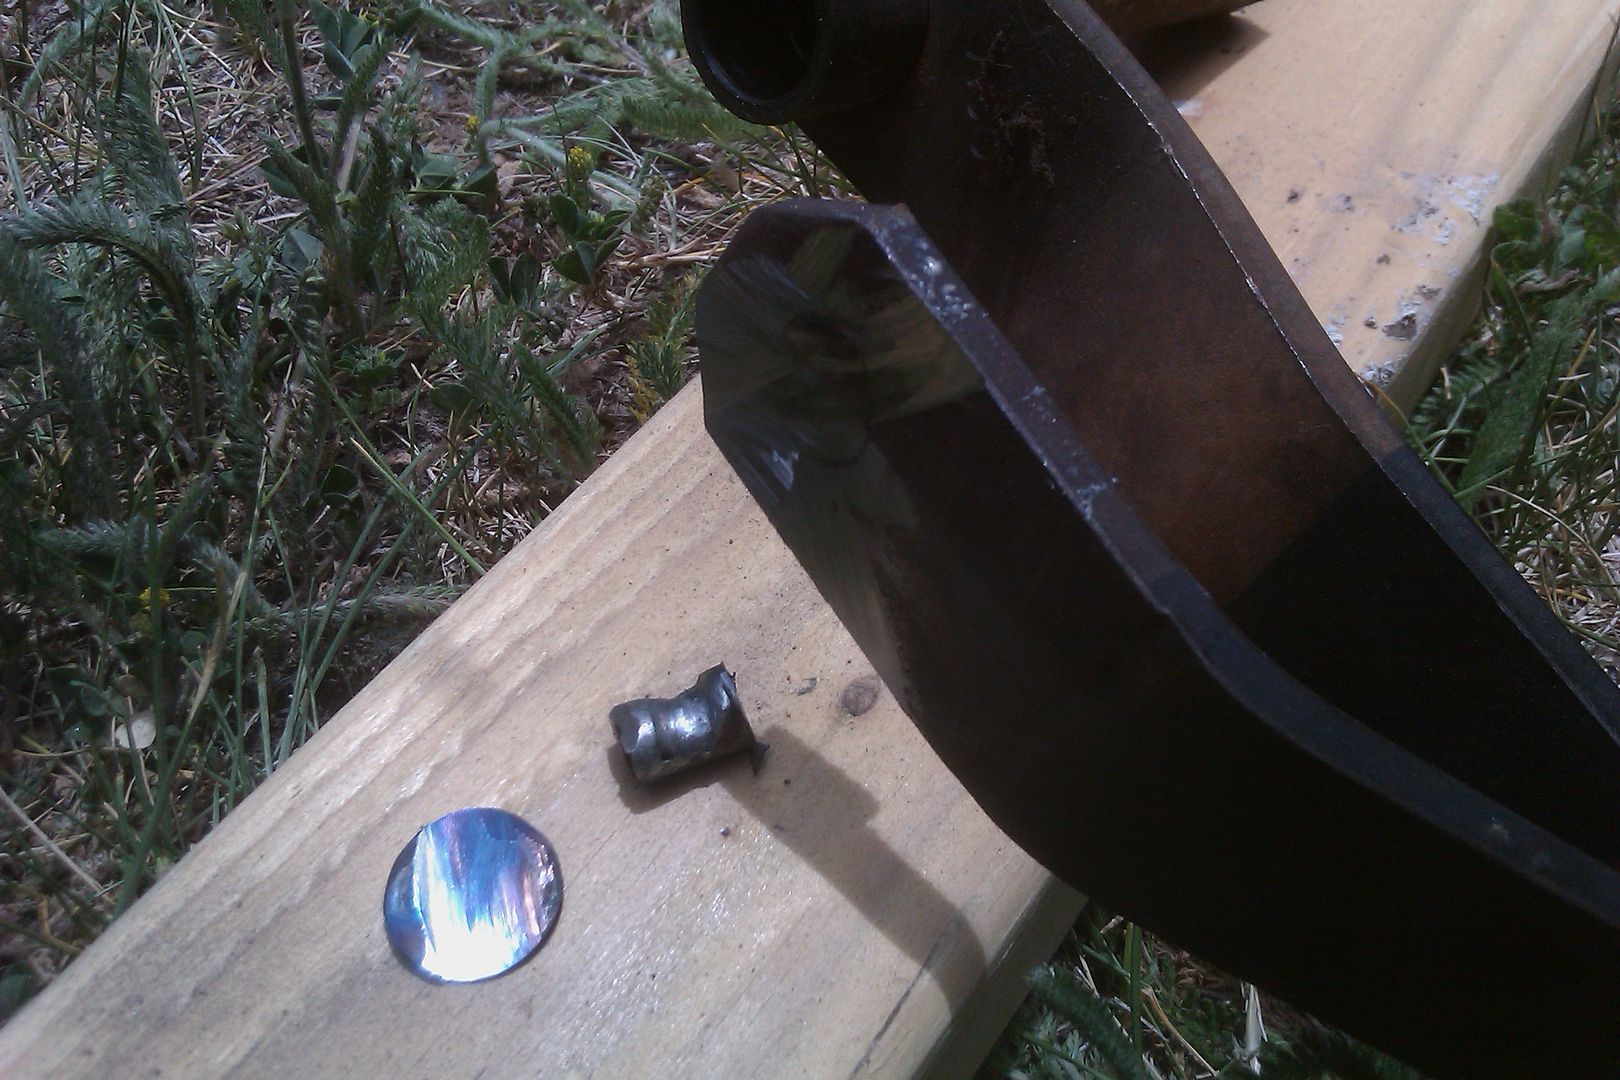
I think my pivot pin was a little worn....

Image

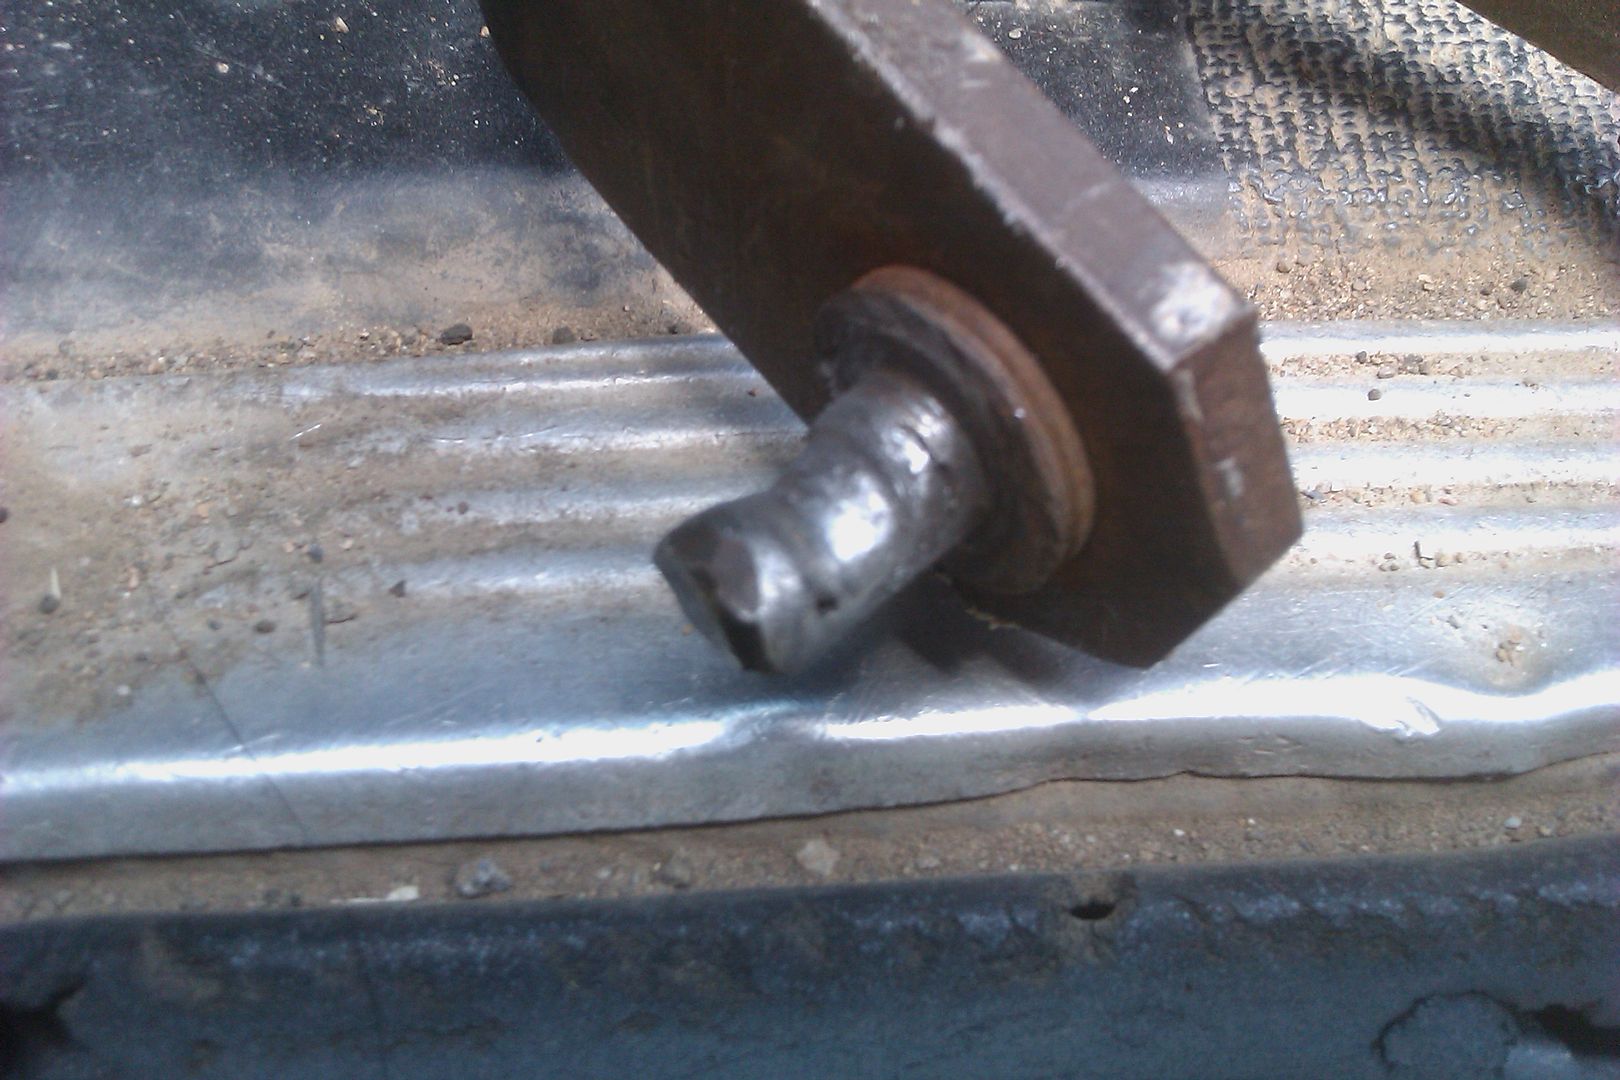
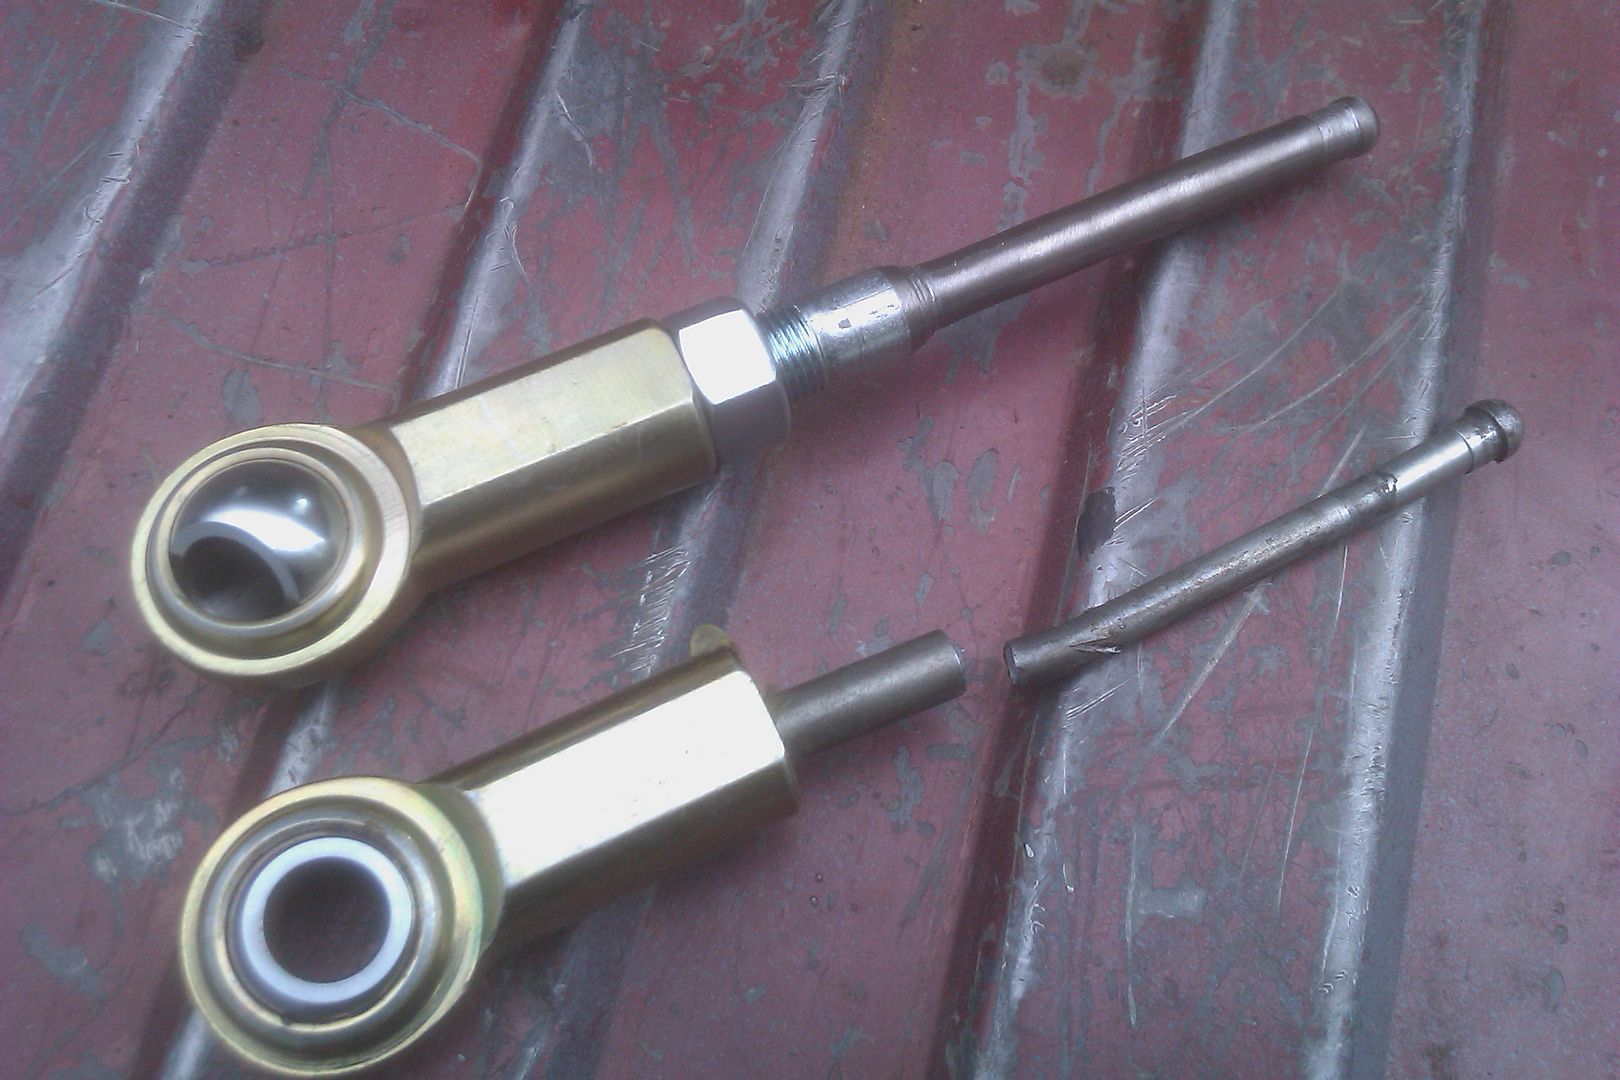
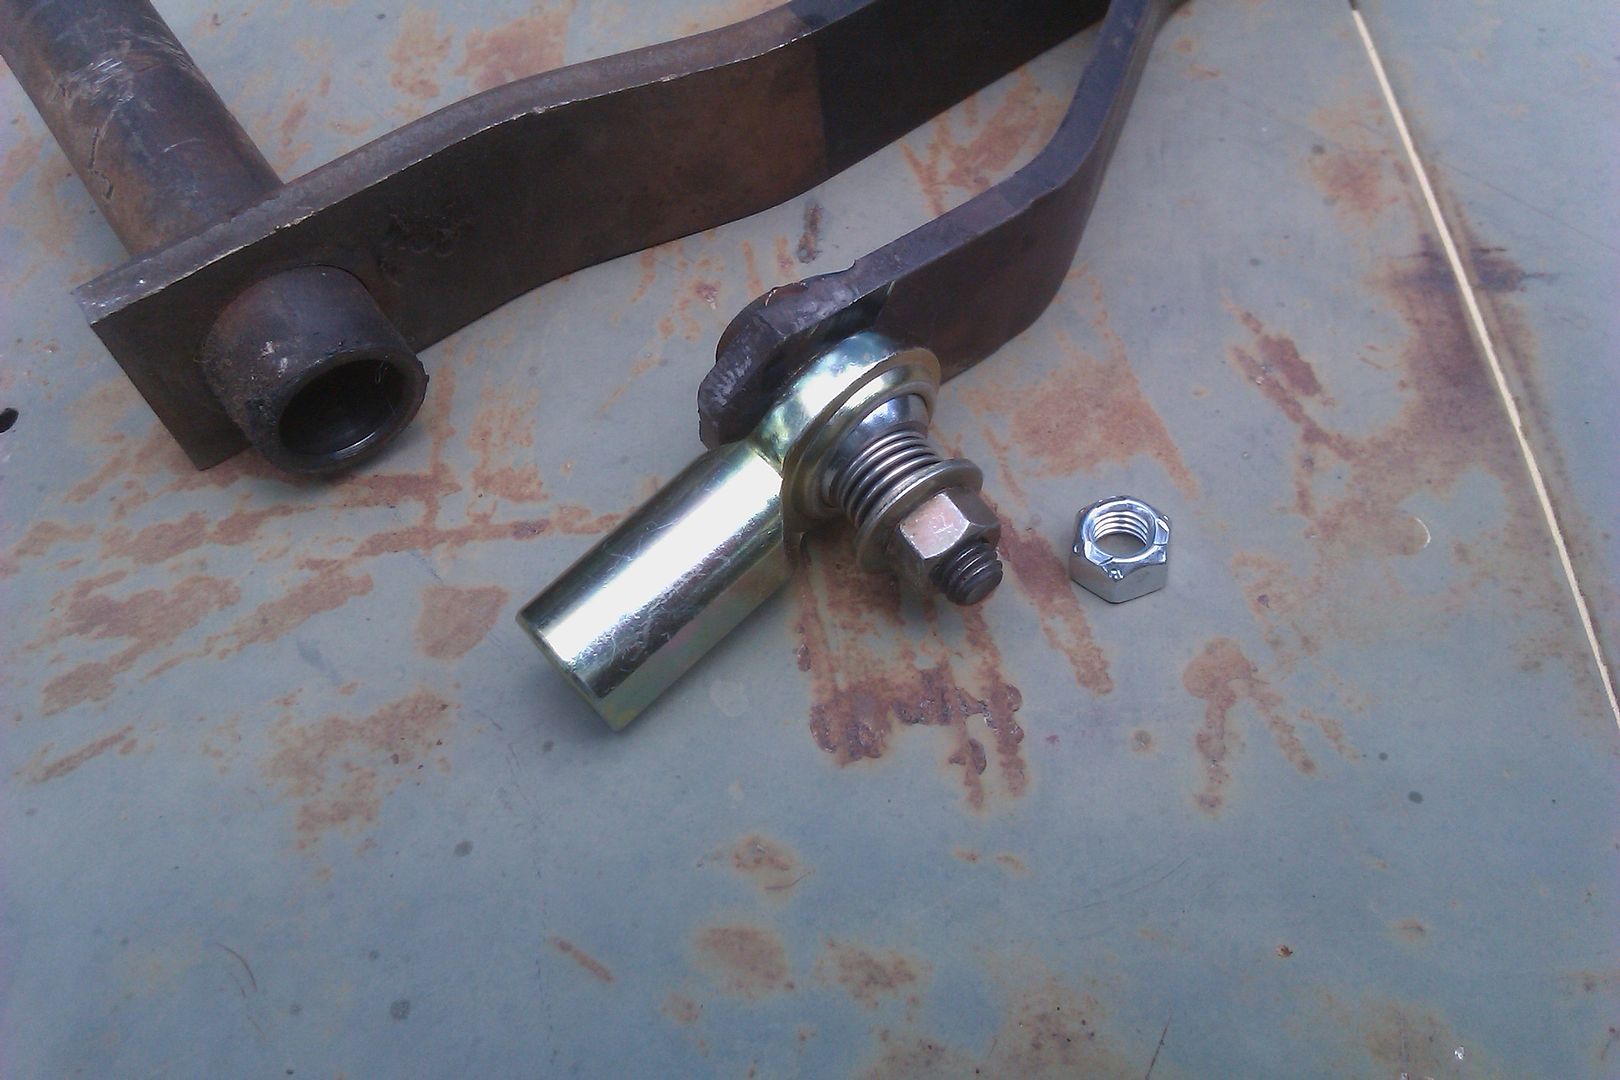
Once the pedal was out I attacked it with a .040 cut off wheel on the the grinder. In about 2-3 minutes I had it cut apart. The original pin just dropped right out. The hole was just slightly bigger than 1/2". I used a 1/2" shoulder bolt to replace the factory pin, I think it was 1.25" long.

Image

Image

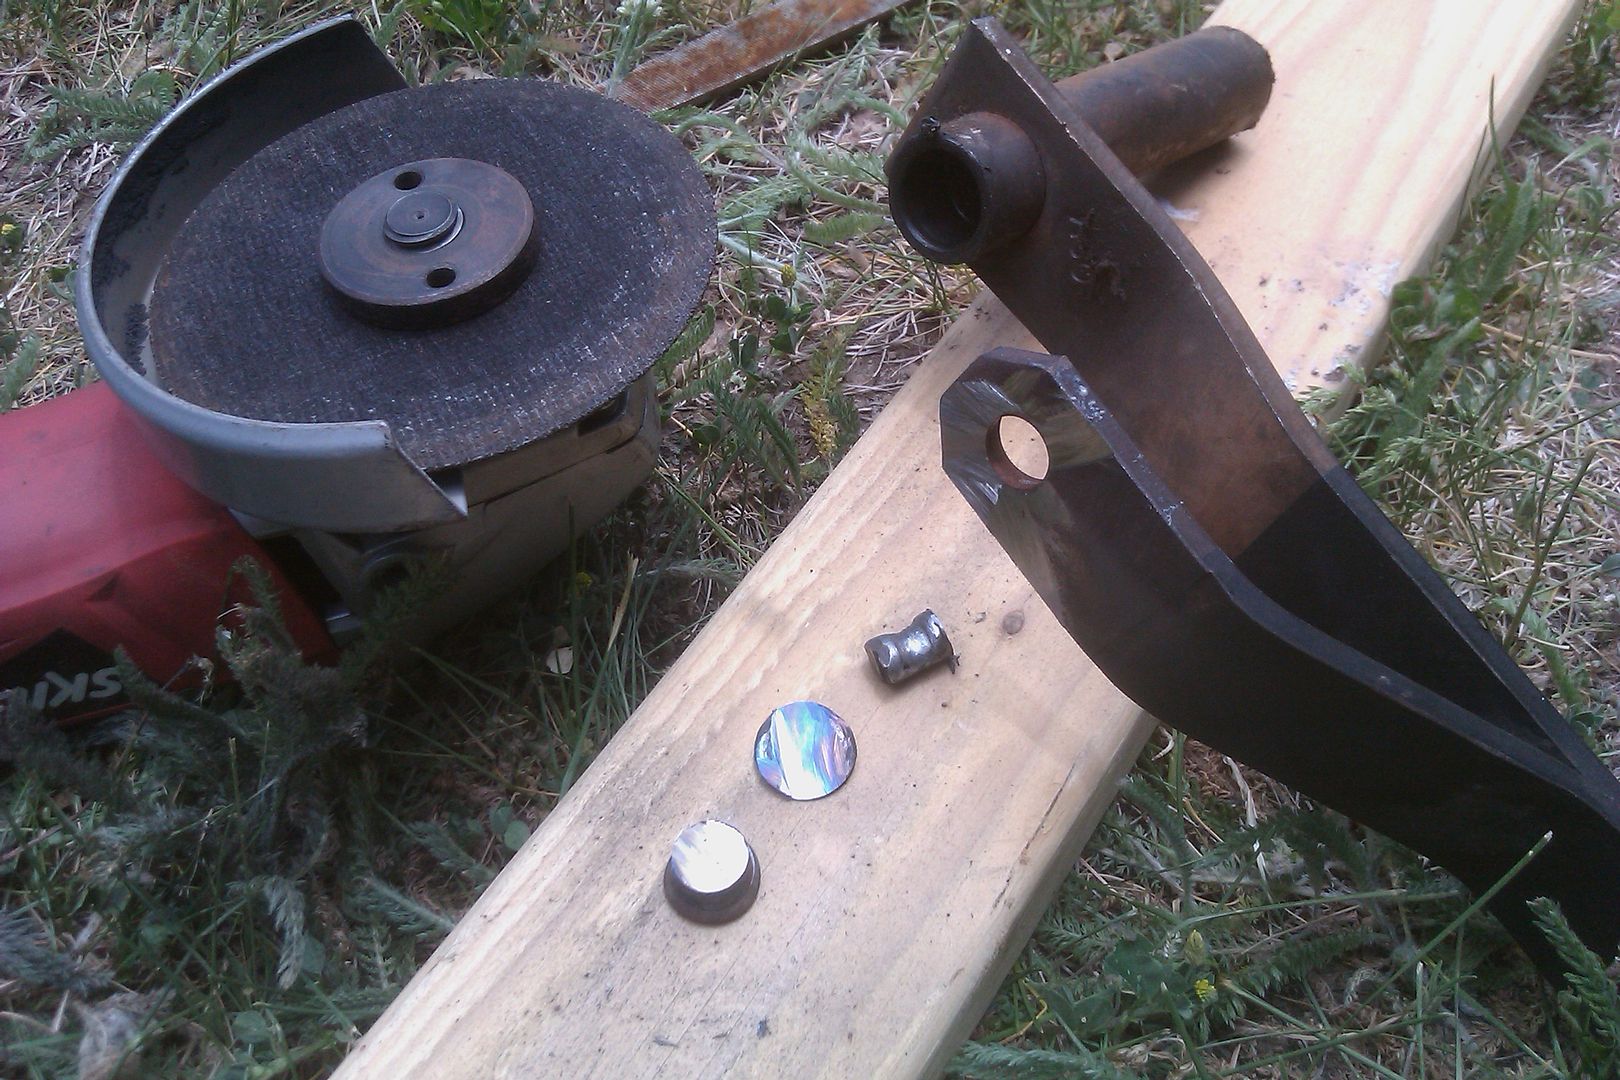
I rigged up a clamp to keep the shoulder bolt perpendicular to the pedal. I did this with a c-clamp, a big socket, and a nut for some working space.

Image

Image

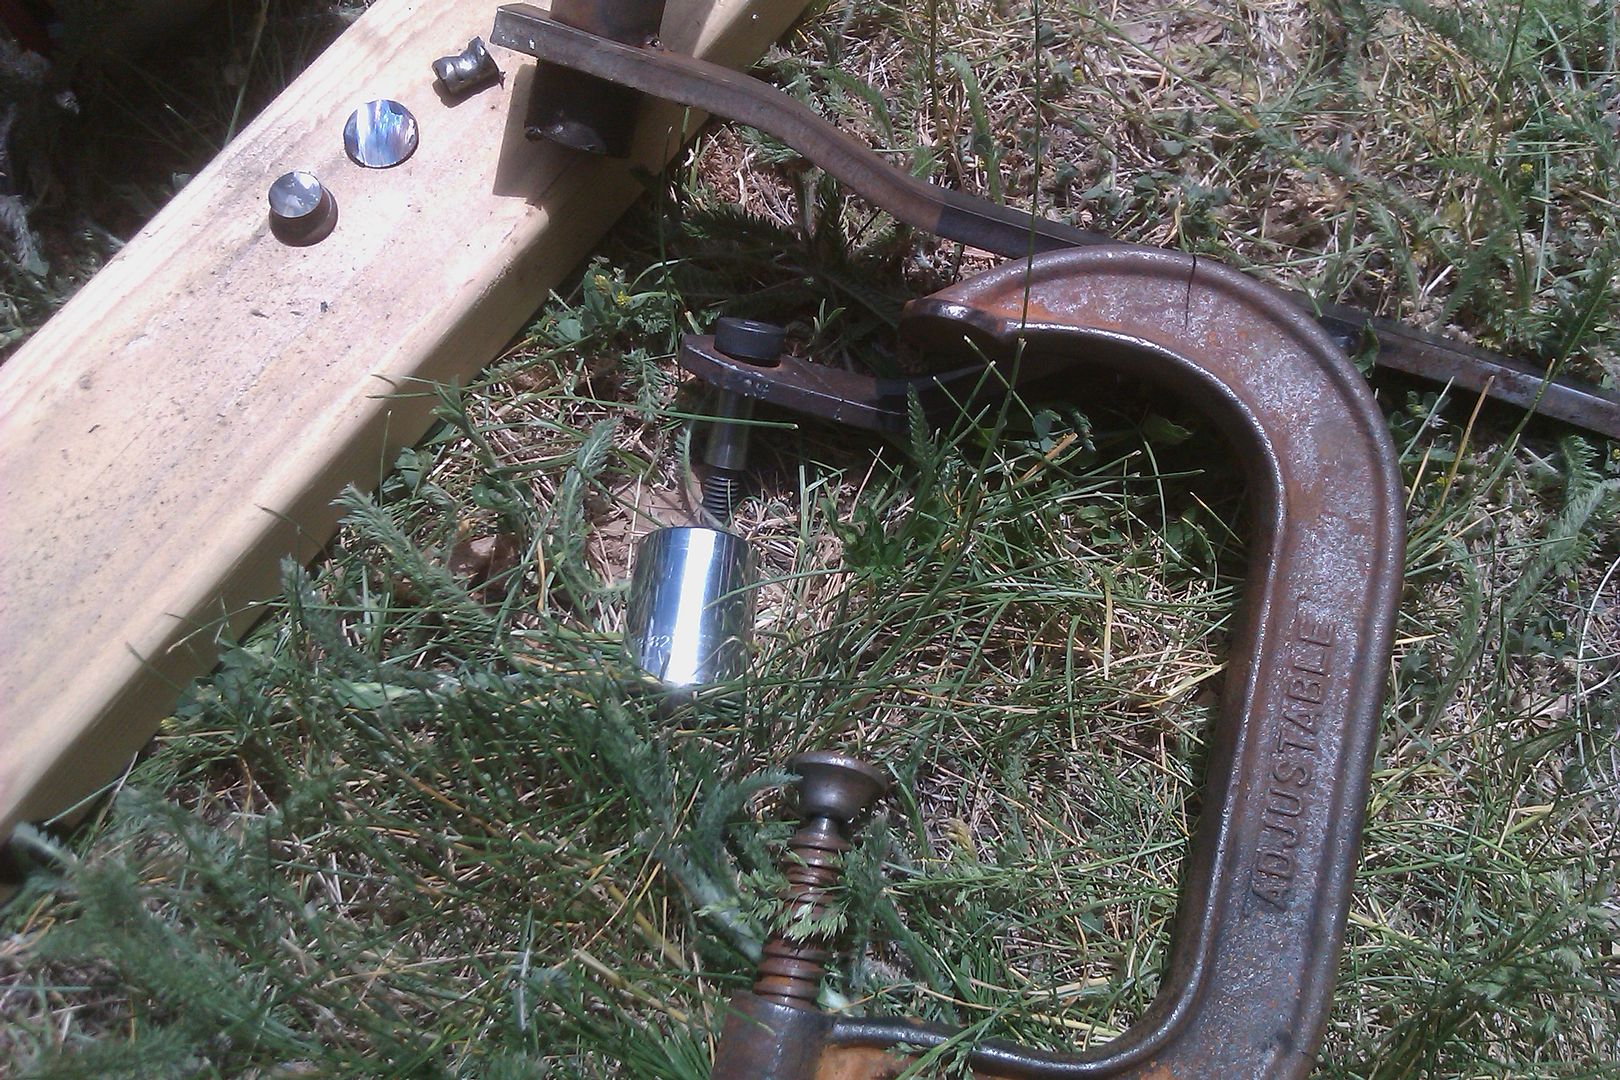
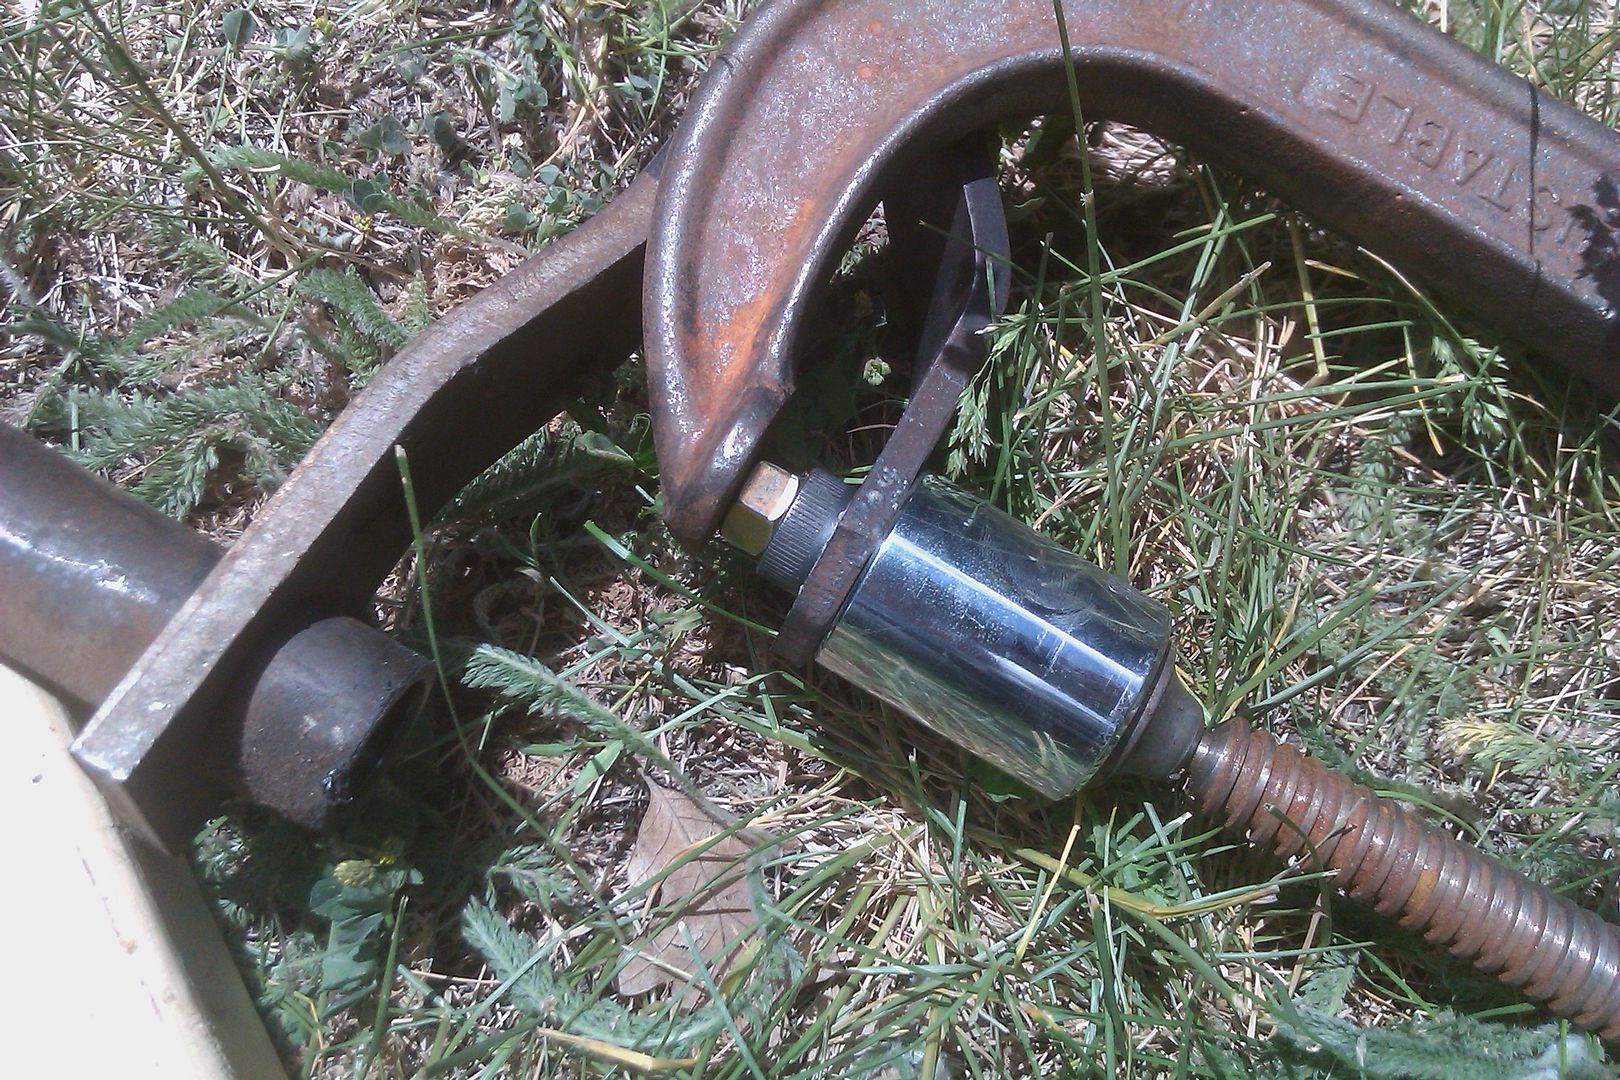
Next I used the MIG welder to goober up some weld on the backside of the pin mounting surface. The clamp was successful at holding everything in place while I welded.

Image

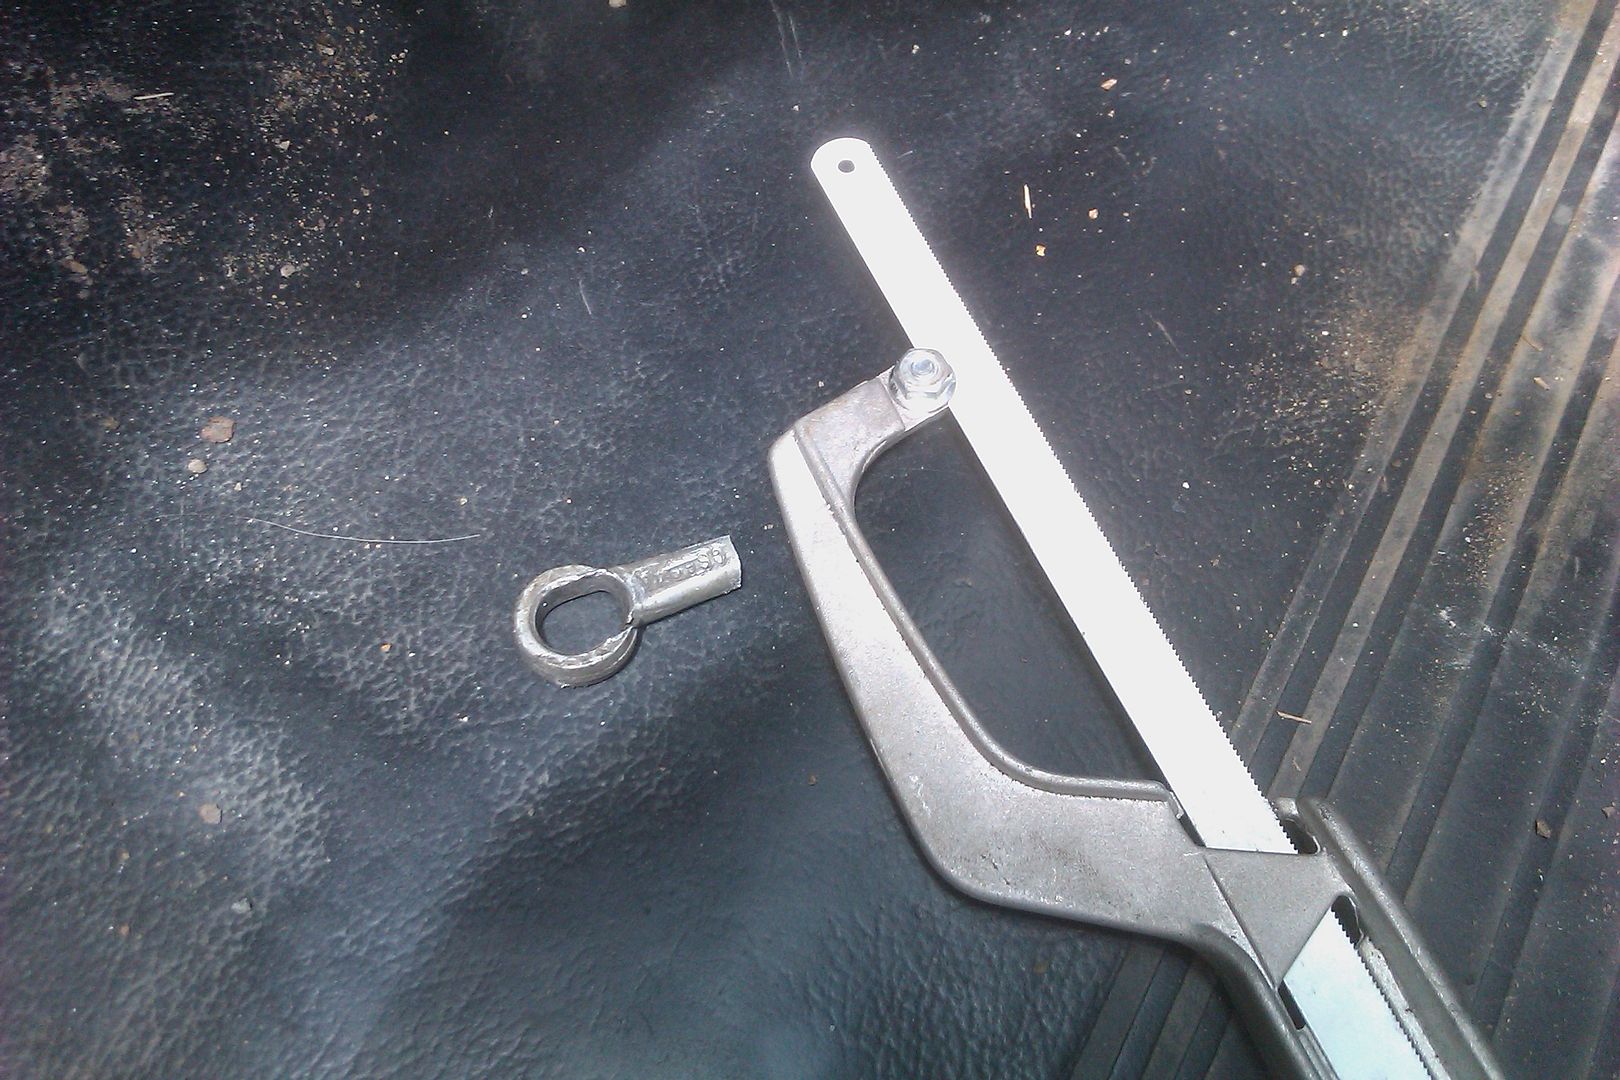
While I waited for the clutch pedal to cool I chopped off the old worn out end of the clutch pushrod with a small hacksaw under the dash. You could remove the clutch master cylinder but then you have to bleed the system again. It took like 5-10 minutes one you squiggle into position under the dash.

Image

Buy that time the pedal was pretty cool so I reinstalled it. Make sure to put the pivot bushings back in.

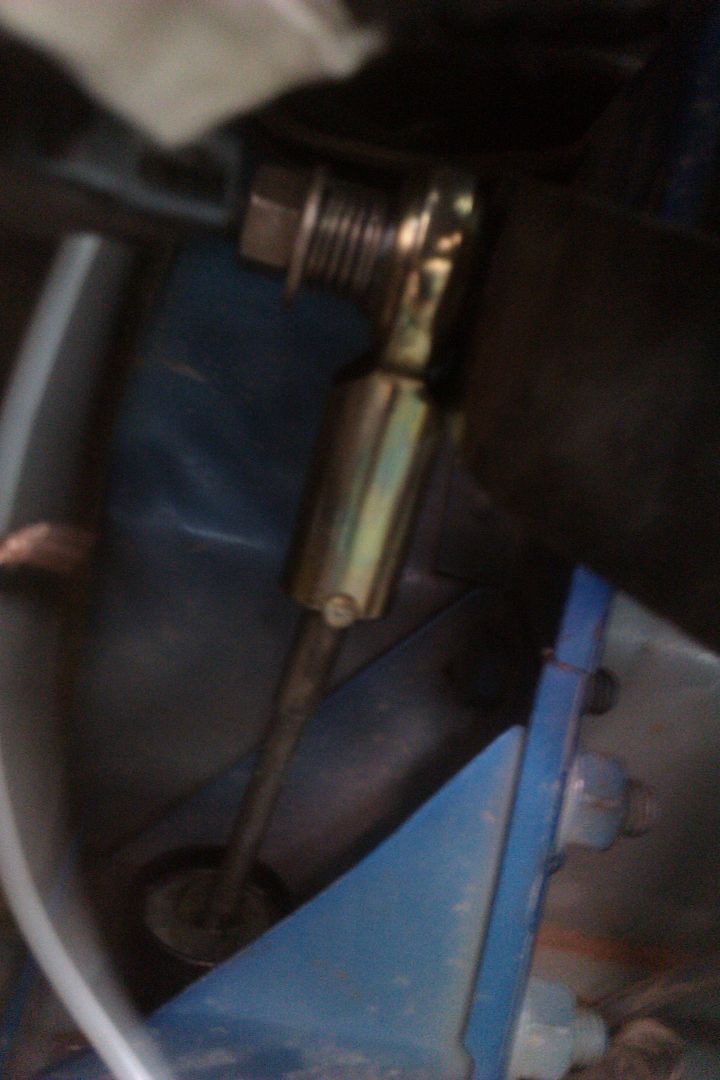
I then used a 1/2" female rod end to make the new pivot. This slides right on the shoulder bolt with a pretty good .010 fit. I inserted a 1/2" set screw into the bottom of the rod end. This allowed me to set the position of the pedal and account for the change in length of the hacked off push rod.

This is what it looks like assembled.

Image

Once I got everything mocked up like I wanted, I disassembled it and filled the female rod end with epoxy.

Image

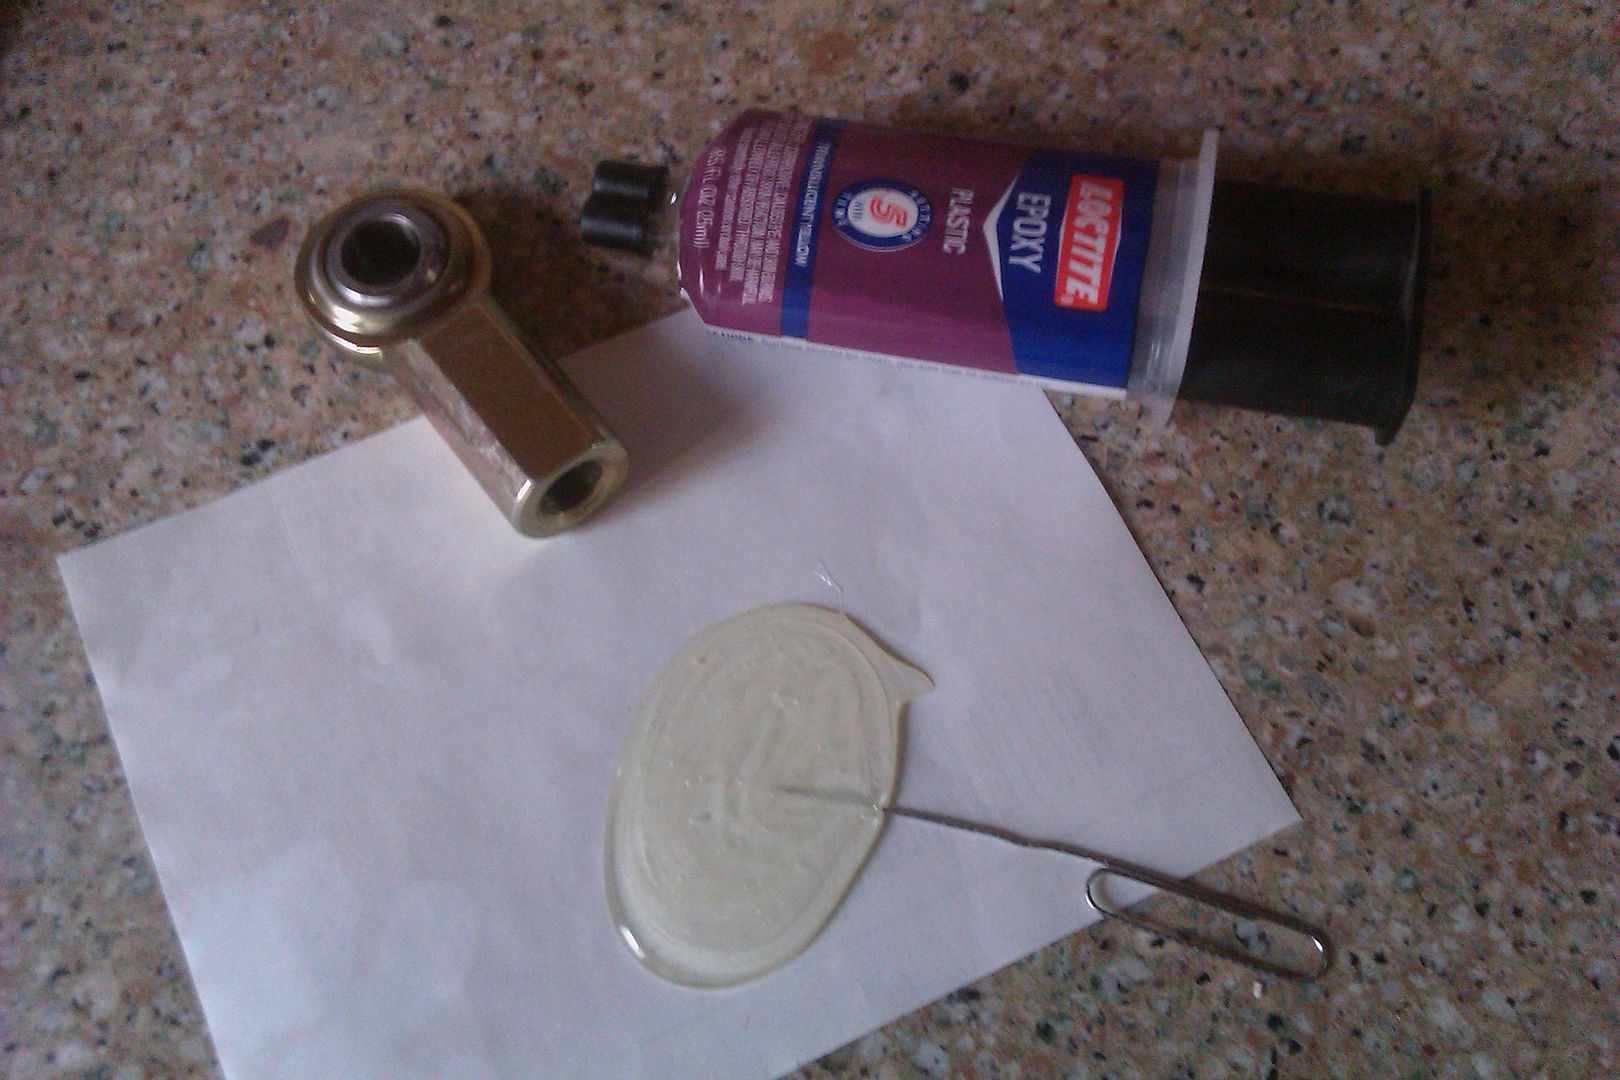
Then I reassembled everything using a paper towel to keep most of the epoxy in the rod end when the clutch push-rod was inserted. I kept everything in the right position and counted to 600, that gave the epoxy time to set up enough it wouldn't run.

Then I assembled everything like this. I used a small spring, a washer, and a 3/8 nut on the end. I will replace the regular nut with a locknut if everything holds up for a few months. I may replace the spring with wave washers or a bushing if thing move around at all.

Here is what it looks like under the dash all finished up!

Image
92 W250 regular cab manual transmission...
http://www.expeditionportal.com/forum/s ... hp?t=24653
Mieser
fuel pin?
 
Posts: 21
Joined: Sat Sep 27, 2008 1:02 pm

Re: Clutch master cylinder pushrod repair

Postby ellis93 » Sat Jun 18, 2011 6:18 pm

Very nice. 8)
93 D250 ,5 speed,4.11s,k&n autometer tach pyro trans boost guages,GDS 60mm h1c 14cm,honed 5x10,hplp/reg,1/8 timing,M+H M2 fuel pin, tims cooler tubz
User avatar
ellis93
14mm rotor
 
Posts: 7761
Joined: Wed Feb 17, 2010 3:16 pm
Location: lucedale,mississippi

Re: Clutch master cylinder pushrod repair

Postby Tacoclaw » Tue Oct 22, 2013 6:31 pm

Meiser's name is Metcalf over on the Expedition Portal forum.

Metcalf wrote:Image

I stopped by the hardware store after work and picked up what I needed to make my heavy duty replacement pushrod.

A few minutes on the lathe and I was able to turn down a 4.5" long 1/2-20 bolt into the new pushrod. I needed to reduce the diameter to approx .350" to replicate the dia of the 'ball' on the factory unit. I then stepped down the diameter behind the 'ball' area a little bit for the teeth in the little spring clip on the clutch master to hold the pushrod in place.

The new push-rod then was threaded into a new rod end to fit my modified pedal linkage with a nut to lock everything into length. This new unit is now adjustable which is a bonus for tuning the pedal position and where the clutch lets up.

For those trying to do this, just use a 3/8 rod end and pin on the pedal instead of the 1/2" units I used. I think it would fit a little better, and you wouldn't have to turn the bolt down as much.

If some of you with Getrag dodge trucks are having notchy shifting I would check out your clutch linkage. I think once the linkage gets worn or bent a little bit you don't get full disengagement of the clutch leading to notchy shifting. With this new pushrod installed my truck now shifts SO MUCH better!
1990 W250 4x4
Rattles, growls, whistles, and whines.
User avatar
Tacoclaw
14mm rotor
 
Posts: 4108
Joined: Wed Mar 11, 2009 7:50 am
Location: Cheshire, OH
Top

Re: Clutch master cylinder pushrod repair

Postby RCCUMMINS89 » Tue Oct 22, 2013 9:04 pm

Thank you..........I am in dire need of doing this as well
89 RC on shortened 92 diesel frame - NV4500 w/dual disc/4.10s on 37s. - Self built pump, "hot screw", lots of timing, True high volume low pressure lift pump, 62fmw/68/.7gated, 77lpm SAC Inj., Studs/O-rings,- 423/1220 Mustang - 11/16/2013 http://www.TheHungryDiesel.com full line dealer, if you don't see it please ask.
RCCUMMINS89
14mm rotor
 
Posts: 4826
Joined: Mon Oct 03, 2011 4:19 pm
Location: Spirit Lake, ID
Top

Re: Clutch master cylinder pushrod repair

Postby Tacoclaw » Wed Oct 23, 2013 2:29 am

Then you'll need this too, I screwed with mine forever before finally giving up and googling it. I managed to do mine while still under the hood though, I wasn't bleeding that damn clutch again. This is to get the old rod out of the master cylinder.

Mark Nixon wrote:LIGHTLY clamp the master cylinder in a vise.
Take a long hardened pick and reach in and fold one of the tabs back, then use a twisting, pulling motion on the rod and it'll pop out.

All it takes is getting the end to go past ONE of the tabs.

Done several to make the 2nd gen master work on a 1st gen before.

Mark.


I used a small welding rod I busted the flux off of and ground a short angle on the end.
1990 W250 4x4
Rattles, growls, whistles, and whines.
User avatar
Tacoclaw
14mm rotor
 
Posts: 4108
Joined: Wed Mar 11, 2009 7:50 am
Location: Cheshire, OH
Top


Return to Transmission

Who is online

Users browsing this forum: No registered users and 55 guests