Just a little more . . . . .

How to make it go fast

Moderators: Greenleaf, KTA, BC847, Richie O

Re: Just a little more . . . . .

Postby DMan1198 » Thu Jan 05, 2017 7:56 am

I know someone who got all his piping, and housings coated in something called white lightning. Apparently it goes on hot, and really thick. He said it was quite a bit of work to get some of it off around the flanges.; I've got vht 2000* paint on mine that I put after sandblasting, and smoothing everything, and when it sat in the rain things started rusting. I touched it up the other, so we'll see how long that lasts.
Ducati- professional nap taker, and thread derailer extraordinaire
Brownie: 80 dodge heavy half. Ghost cummins under the hood, and some sinister plans
The Roo Hunter: 93 w250, lifted, 2 whistle machines, and a bunch of other go fast goodies, uhh..... not there yet
Jaeger: 12 ram 3500. Lifted, exhausted, and fed an excessive quantity of air
The Huntress: 02 Jetta TDI. No muffler, egr, horsepower
DMan1198
14mm rotor
 
Posts: 2255
Joined: Sat Aug 10, 2013 6:26 am
Location: Slave Lake, Alberta

Re: Just a little more . . . . .

Postby BC847 » Thu Jan 05, 2017 4:07 pm

As I understand things, SwainTech offers the White Lightening product: http://swaintech.com/race-coatings/race ... -coatings/


Got 10lbs of 120grit Aluminum oxide on the way.
David

1993 12mm VE Fueled W250 CC, Green
12.67 @ 103.35
Your basic farm truck ;)
BC847
Administrator
 
Posts: 2203
Joined: Wed Jan 03, 2007 5:22 pm

Re: Just a little more . . . . .

Postby PToombs » Thu Jan 05, 2017 4:47 pm

I was going to suggest sandblasting it, even with a hand held one. When I put my twins on I bead blasted the manifold, and the exhaust housings were both new. I clean the housings with brake cleaner, then coated all 3 pieces with that stuff, it's called Calyx. It only lasted 3 or 4 months and then the rust was bleeding thru. You are supposed to keep coating it, but you have to clean the rust off, which is almost impossible without taking everything apart every time.
I wouldn't think that the expansion rates of the coating and the housing would be that different.
pete

Just enough power to break everything behind the crankshaft.
User avatar
PToombs
14mm rotor
 
Posts: 11367
Joined: Sun Jan 07, 2007 6:13 pm
Location: Syracuse NY. Snow central!
Top

Re: Just a little more . . . . .

Postby BC847 » Thu Jan 05, 2017 6:12 pm

In the case of the Cerakote, they want you to roughen the surface with hard, sharp/fractured Garnet or Aluminum Oxide. Specifically 100 ~ 120 mesh media. Any coarser will make the microscopic valleys & peaks too deep/tall that the coating won't fill the valley, and still cover the peaks with single application ONLY of 1 ~ 2mils thick film. Using standard Silica-sand results in too smooth a surface as it's not as hard as the former (it fractures/powders on impact).
They are very clear that one should not use glass-beading as that peens the surface, thus smoothing it with shallow dimples. Further, they don't want you to clean/wash the stuff with anything after blasting. Just blow it clean with dry, high pressure Air. Don't foul the surface with your oily booger-hooks, wear powder-free gloves.

Apparently, in the world of blasting media, the Garnet, Aluminum Oxide, fractured steel-shot, and the like are destructive to the surface whereas Glass-beading and the like is not so much. It matters pending what you're working on. One can even get the likes of shredded corn-cob or coarse-ground walnut shells for gentle cleaning. Or short/fine cut Zinc wire for situations where cross-contamination/sanitation is a concern.

The stuff I've ordered is the latest and greatest recipe that includes being able to Air-cure. Four hours for tack-free handling. 24 hours for safe, gentle handling/installation. Five days for full cure. No heat is to be applied till it's fully cured.


As far as general corrosion prevention, the exhaust housings will be the greatest concern as they're made of Cast-Iron. Pretty-much straight forward there. BUT! While the 304 Stainless-Steel is inherently corrosion resistant below approx 1500*f, it's corrosion resistance deteriorates with increasing temperatures. The Chromium content (that which gives the steel its corrosion resistance) precipitates into another element, that which I can't remember just now. It's not immediate, it's a cumulative thing.

As long as I keep the EGTs below 1500*f or so, it shouldn't rust. (They didn't tell ya that when they sold you the SS exhaust system, did they? :evil: ).

Image


For the more immediate future, where I welded the SS, the little bit of filler material I used is formulated to account for the loss of Chromium. OK, fine. On either side of the actual weld bead, the base metal obviously has been heated. It's called the Heat Affected Zone. In there, the Chromium has been cooked. It's there, that streaks of corrosion will appear first. On either side of the weld beads. Further, In over 50% of my welds, I didn't use any filler. The cuts were true enough that I could simply run the two pieces together with a fluid puddle. Those weld beads will corrode in their entirety. :? :(

Image


All this can be easily fixed by placing the entire article in a way over 1000*C furnace that sports a controlled atmosphere, for a number of hours. Yeah, OK. I'll get right on it. I wonder if the wife would notice the oven got over 1000*C for a while?


So, I'm coating the SS too. Sure hope it works and lasts.

Oh yeah, it's also suppose to be relatively good insulator compared to the bare metal. Keep the heat in the gases.


Can't just change the oil. :roll:
David

1993 12mm VE Fueled W250 CC, Green
12.67 @ 103.35
Your basic farm truck ;)
BC847
Administrator
 
Posts: 2203
Joined: Wed Jan 03, 2007 5:22 pm
Top

Re: Just a little more . . . . .

Postby PToombs » Fri Jan 06, 2017 5:38 pm

I bead blasted my stuff because my buddy has a blast cabinet.
All I can say is wow on all the rest of that stuff you posted. There is so much to know about welding specialty metals like stainless that it makes your head spin.
I think I'll just let my stuff rust. :lol:
pete

Just enough power to break everything behind the crankshaft.
User avatar
PToombs
14mm rotor
 
Posts: 11367
Joined: Sun Jan 07, 2007 6:13 pm
Location: Syracuse NY. Snow central!
Top

Re: Just a little more . . . . .

Postby BC847 » Fri Jan 06, 2017 10:40 pm

I'm blessed in that I've a 27ish year good relationship with the auto parts / machine shop close to my Dad's house (Did the machine/tool electrical, HVAC, and pneumatics for the then new shop. Done occasional service and repair when the mfgs were slow since). They're good people.

Anyhoo, they've got a big industrial bead-blast box and are going to let me temporarily swap their glass bead media with my Aluminum Oxide media. 8)
David

1993 12mm VE Fueled W250 CC, Green
12.67 @ 103.35
Your basic farm truck ;)
BC847
Administrator
 
Posts: 2203
Joined: Wed Jan 03, 2007 5:22 pm
Top

Re: Just a little more . . . . .

Postby ellis93 » Sat Jan 07, 2017 11:36 am

Having friends with tools (that'll loan them) is wonderful. I work on a lot of others equipment,tractors/hoes/dozers,and when in need I can usually get anything I need lol
93 D250 ,5 speed,4.11s,k&n autometer tach pyro trans boost guages,GDS 60mm h1c 14cm,honed 5x10,hplp/reg,1/8 timing,M+H M2 fuel pin, tims cooler tubz
User avatar
ellis93
14mm rotor
 
Posts: 7761
Joined: Wed Feb 17, 2010 3:16 pm
Location: lucedale,mississippi
Top

Re: Just a little more . . . . .

Postby BC847 » Tue Jan 10, 2017 3:26 pm

Had to edit my post above as I had inadvertently mixed up Celsius and Fahrenheit. :roll:
Typical:


Oxidation Resistance
The maximum temperature to which Type 304 can be exposed
continuously without appreciable scaling is about 1650 °F (899 °C).
For intermittent cyclic exposure, the maximum exposure temperature
is about 1500 °F (816 °C).

As found here (for example): http://www.aksteel.com/pdf/markets_prod ... lletin.pdf
David

1993 12mm VE Fueled W250 CC, Green
12.67 @ 103.35
Your basic farm truck ;)
BC847
Administrator
 
Posts: 2203
Joined: Wed Jan 03, 2007 5:22 pm
Top

Re: Just a little more . . . . .

Postby DodgeFreak » Tue Jan 10, 2017 4:31 pm

I wondered if it was a typo.....I couldn't see how you could keep it under 800*F racing lol.
92 D350 Cab and Chassis. Auto stock, wiring gremlins. 330k miles
92 W250 Ext cab rotted completely out. Auto, pump maxed, 215 ppump nozzles, Denny T2 pin.
85 D350 single wheel, converted to cummins, getrag, turned up 2 turns and afc screw flush.
User avatar
DodgeFreak
14mm rotor
 
Posts: 1701
Joined: Sat May 15, 2010 8:14 pm
Location: Iowa
Top

Re: Just a little more . . . . .

Postby BC847 » Sat Jan 14, 2017 12:42 pm

Got the Cerokote product. Waiting for the blast media.

Cold, wet icy 9*f one day, warmer, wet, and 68*f a couple days later. :roll:

I'm hoping to get on with the swap in the next couple of weeks.

In the mean time, my remote fan assisted transmission fluid cooler's indicator light is coming on randomly with the fan no longer functioning. DOH!
David

1993 12mm VE Fueled W250 CC, Green
12.67 @ 103.35
Your basic farm truck ;)
BC847
Administrator
 
Posts: 2203
Joined: Wed Jan 03, 2007 5:22 pm
Top

Re: Just a little more . . . . .

Postby BC847 » Sun Jan 29, 2017 5:54 pm

Well, got the tarp up.

This is what's coming out:

HT3B / 23(?) under an S362/65/14WG. Four inch down-pipe.This ceramic coating is right at seven years old (Cerakote product).

Image


Four inch feed-pipe, Stock/OEM located windshield wiper fluid reservoir, and HVAC filter/drier. ATS 3-Piece exhaust manifold.

Image


I suppose it won't hurt to clean and paint a little while I'm in there.

Image


On that note, I've decided to hold off on doing the ceramic coating of stuff till after it's all been fitted and proper.
David

1993 12mm VE Fueled W250 CC, Green
12.67 @ 103.35
Your basic farm truck ;)
BC847
Administrator
 
Posts: 2203
Joined: Wed Jan 03, 2007 5:22 pm
Top

Re: Just a little more . . . . .

Postby BC847 » Tue Jan 31, 2017 8:41 pm

Made room for the new stuff.

Image


With the HT3B's bearings loose, to the point the compressor briefly kissing the cover once, and me driving it for another 500 or 1000 or so more miles, I found the oil seal has failed and it's been leaking pretty good. Oil going into the secondary. :roll: Fortunately, it wasn't making it to the after-cooler so no mess to clean up there.
Found one exhaust manifold bolt loose. Like WTF?! loose. Suggests I've been a slack-ass, huh?

Anyhoo, gotta clean it all.
David

1993 12mm VE Fueled W250 CC, Green
12.67 @ 103.35
Your basic farm truck ;)
BC847
Administrator
 
Posts: 2203
Joined: Wed Jan 03, 2007 5:22 pm
Top

Re: Just a little more . . . . .

Postby DMan1198 » Tue Jan 31, 2017 9:14 pm

Well this is getting exciting.
Ducati- professional nap taker, and thread derailer extraordinaire
Brownie: 80 dodge heavy half. Ghost cummins under the hood, and some sinister plans
The Roo Hunter: 93 w250, lifted, 2 whistle machines, and a bunch of other go fast goodies, uhh..... not there yet
Jaeger: 12 ram 3500. Lifted, exhausted, and fed an excessive quantity of air
The Huntress: 02 Jetta TDI. No muffler, egr, horsepower
DMan1198
14mm rotor
 
Posts: 2255
Joined: Sat Aug 10, 2013 6:26 am
Location: Slave Lake, Alberta
Top

Re: Just a little more . . . . .

Postby PToombs » Wed Feb 01, 2017 5:28 pm

Loose is better than so rusted tight it breaks off when you try to take it out!
But then, you don't have to worry about rust like us northerners! :P
pete

Just enough power to break everything behind the crankshaft.
User avatar
PToombs
14mm rotor
 
Posts: 11367
Joined: Sun Jan 07, 2007 6:13 pm
Location: Syracuse NY. Snow central!
Top

Re: Just a little more . . . . .

Postby BC847 » Thu Feb 02, 2017 7:55 pm

PToombs wrote:Loose is better than so rusted tight it breaks off when you try to take it out!
But then, you don't have to worry about rust like us northerners! :P

The next flange over had one bolt that I had to use a 2' cheater on. Fortunately, it popped loose, before the bolt popped. :shock:
I've always used anti-seize on all the bolts along with a torque-wrench. Overall, they were easily removed after being found Gudn'tide.

- Got the 4" exhaust removed from the down-pipe back to the muffler under the bed. Those band-clamps sure make it easy.
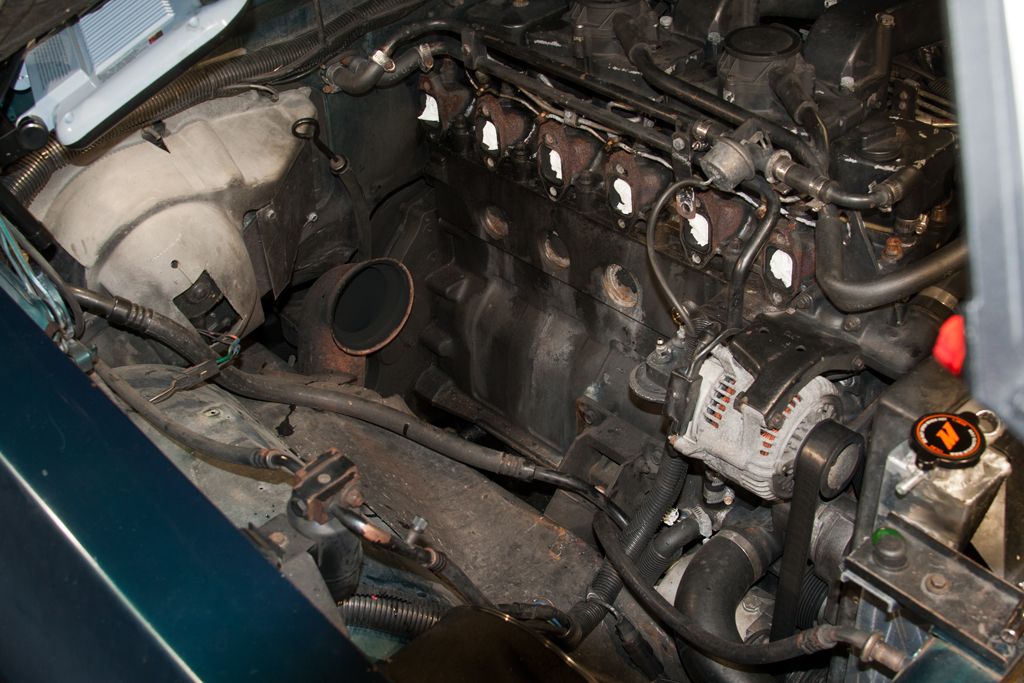
- Drained engine lube-oil.
- Recovered four gallons of perfectly good 50/50% antifreeze. (Six months old?)
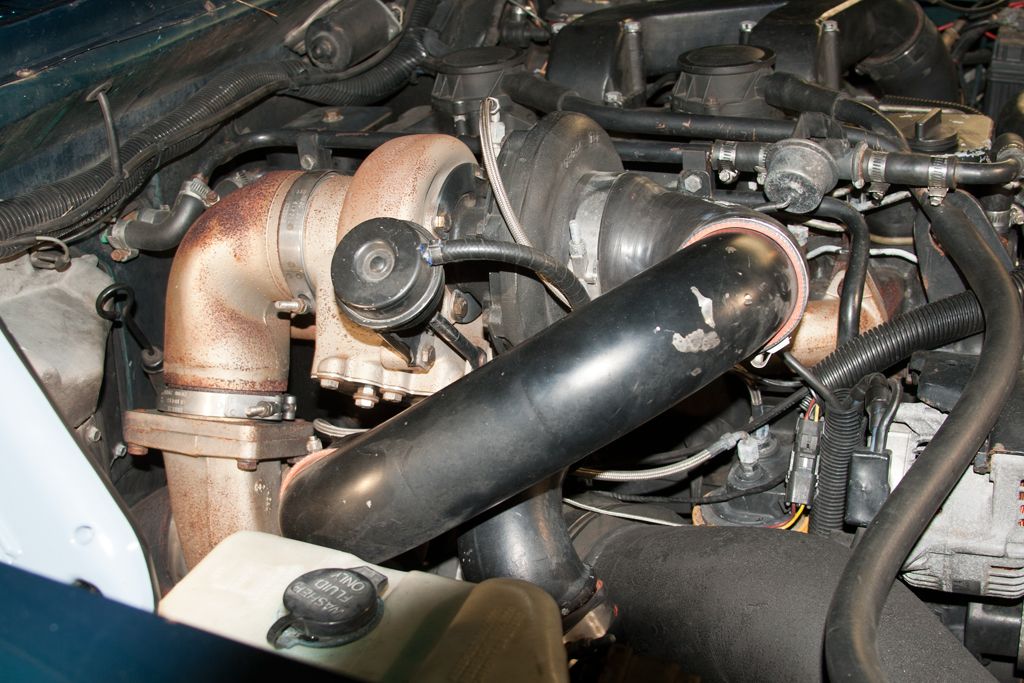
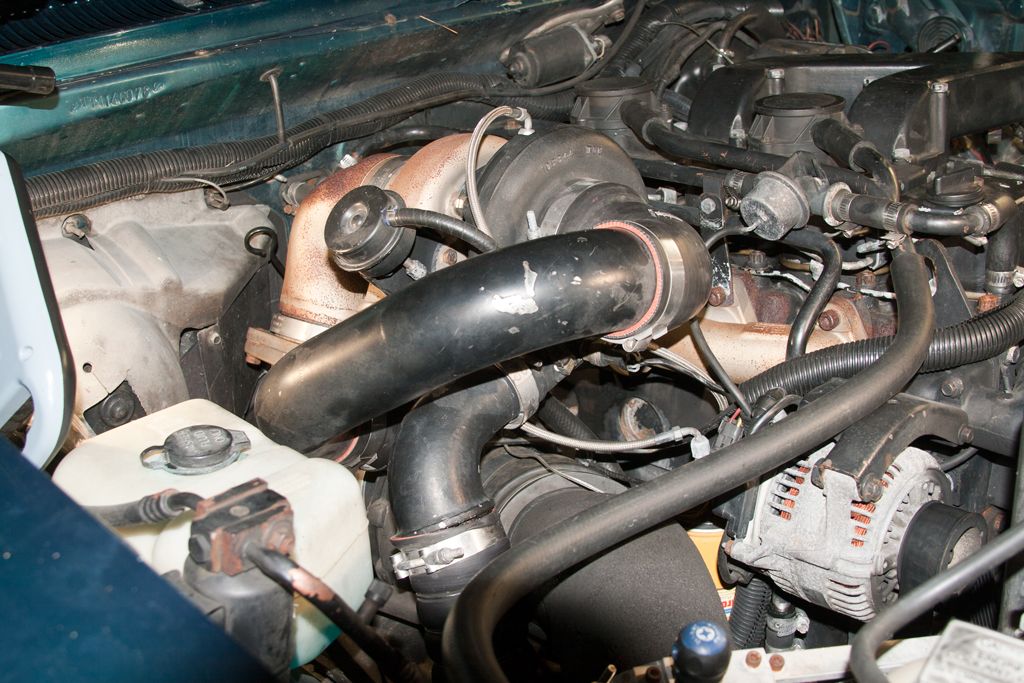
- Completed the removal of the former HT3B's mount and oil return line to the engine's pan.


Trying to sort-out in my head the general sequence of the mess. No need in duplicating work along the way.

- Pressure-wash the engine and bay, including underside as it sits so I don't draw back as much black goo on my knuckles.
- Remove stock/OEM oil filter/cooler cover and with a couple of bolts, replace with the marine cooler cover.
- Using few bolts, install the new assembly, less gaskets.
- Be tickled chitless because my earlier ciphering was spot-on regarding the overall fit. (Fingers crossed).
- After getting the general positioning of the assembly right, complete the fabrication of the front assembly mount (to the new oil cooler cover).
- Be pleasantly surprised that I won't have to tweak the passenger's inner fender well. (Fingers crossed).
- Cipher and complete fabrication of 5" down-pipe past the transfer-case including proper mount at transmission bell-housing. (This will take a couple of evenings, or so).
- Cipher and order parts to make hoses and, locate and fabricate remote engine lube-oil filter-head mount.
- Stand back and stare at it a while to figure out what I'm missing . . . . . like where to install those bungs for inter-stage drive-pressure and boost-pressure for example . . .
- Remove entire new assembly including the marine oil cooler cover.
- Install those stupid bungs!
- Blast all hot-stuff, inside and out with 120grit Aluminum-Oxide.
- Apply internal ceramic coat as appropriate and oven-cure.
- Apply external ceramic coat as appropriate and allow one full week to air-cure.

While the ceramic mess is curing:
- Remove the weeping ( :shock: ) block freeze-plugs along with the stock/OEM block-heater.
- Recover the R12 refrigerant and remove the HVAC compressor's suction and hot-gas discharge hoses.
- Thoroughly clean the freeze-plug bores as well as all that side of the engine and bay.
- Paint as required the block and that side of engine bay.
- Install new fancy freeze-plugs.
- Install new engine block heater.
- Install new engine lube-oil cooler cover including all new gaskets, oil pressure regulator, associated hoses and remote filter head assembly.
- Initially set the waste-gate actuator.
- Install new trublo assembly including new lube-oil supply plumbing.
- Reconfigure/fabricate and install Secondary to IC plumbing.
- Cipher, fabricate and install new turbo lube-oil drain-lines.
- Install new down-pipe assembly past transfer case.


Shit!

- Figure out how in the Hell I'm gonna build the primary intake feed from the stock-pot mess, then do it.
- Complete fabrication/installation of the exhaust including a new 5" Wye-pipe for the existing bed mounted 5" temporary stack.
- Reroute and install/dress the EGT sensor (new replacement), Secondary drive-pressure sensor, Primary discharge pressure sensor as well as the associated AFC reference plumbing. (Still gotta acquire/install the Primary drive-pressure sensor and cipher how I'm gonna make the DATA logger accept it).
- Repair engine intake-log boost sensor/gauge including a new sensor (It's all over the map with BS readings for the last number of months. I hope a new sensor fixes it).
- Reconfigure/fabricate and install HVAC compressor suction and hot-gas discharge lines as well as the liquid-line and new filter/drier. Recharge system.
- Relocate and install a windshield washer fluid reservoir hopefully using the original.


. . . .. ?
- Put engine oil and antifreeze in it.
- Start it up and check for leaks. Let it get some heat in it. Then let it cool completely.
- Tighten all the fasteners.
- Without slipping the trans, drive it around a little.
- Raise the trans line-pressure. :roll:
- Tighten all fasteners again.


- Don't phack it up, wreck it, or loose driver's license :?

Have I missed anything?
David

1993 12mm VE Fueled W250 CC, Green
12.67 @ 103.35
Your basic farm truck ;)
BC847
Administrator
 
Posts: 2203
Joined: Wed Jan 03, 2007 5:22 pm
Top

PreviousNext

Return to The good stuff

Who is online

Users browsing this forum: No registered users and 35 guests